Soldering jewelry might sound like a daunting task, but it's actually rather simple once you get some experience. If you're curious to learn more about soldering and how to do it yourself, then continue reading our article. You'll find all the information you need to get started.
What Is Soldering?
Soldering is when you join metal parts together. Unlike other metal melting techniques, soldering uses low heat to accomplish this. When using this method, you'll often need to use flux which is a type of substance that cleans the surface of the metal to help make the bonding process easier.
Types of Soldering
There are two main types of soldering: hard and soft. While both will help keep the metal pieces bonded together, they use different methods to do so.
Hard Soldering
This is the type of soldering we are going to use with silver. Hard soldering uses a higher temperature and it can be used with heavy and thicker metals like gold and silver. Hard soldering comes in three different grades: easy, medium, and hard. These help you to pick the right temperature and oxidation needs for the metal you're using. Hard soldering is a bit more intricate compared to soft soldering as you need to use flux and a pickling solution to help keep it together.
Soft Soldering
Soft soldering involves melting jewelry at a low temperature which helps to prevent it from burning or warping. It's used for base-metal jewelry and to fix metals like brass, bronze, and copper.
Important Tools
There are a few important tools you'll need to have on hand. We'll review them below.
Soldering Board
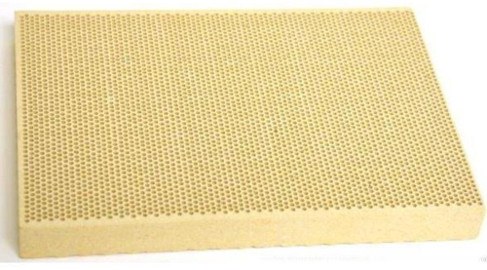
A flame-resistant soldering board is typically made of a durable material, like ceramic, that won't be affected by high heat. A board is important to have because it will keep the piece you're soldering in place and it can even work to reflect heat to help make the soldering process more efficient. These boards come in numerous sizes so you'll be able to find one that fits your needs perfectly.
Torch

A torch is needed for hard soldering and for thicker metal pieces like copper and silver. A soldering torch tends to be a little smaller compared to a typical torch and it has a finer tip to help you reach small areas on your jewelry. Most torches have an automatic switch which makes them easy to turn on.
Besides the main fuel container, torches for jewelry also come with various types of tips you can use. You'll find large swirl tips which can help with big jewelry pieces and smaller pick tips which can help you with carefully applying heat to edges and small areas.
Silver Solder
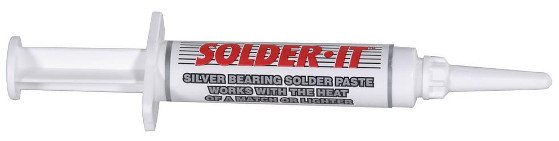
Silver solder is a piece of metal that is a combination of silver and another metal. It's designed to melt at a lower temperature so it can properly join together two pieces of silver. You can buy it in small pre-cut pieces called chips, or you can buy it in sheet or wire-form.
There is also silver paste solder which combines the silver solder with flux. We recommend using paste solder in most cases because it will same you time.
Flux
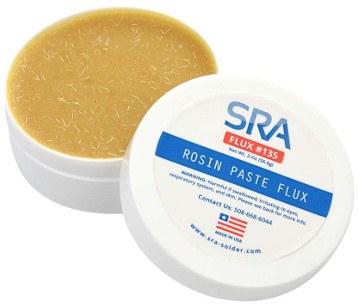
Flux is essentially what makes solder flow. It helps to keep the soldered pieces together and prevent rusting in the future. Some common forms of flux include rosin flux, organic acid flux, and inorganic acid flux.
- Rosin flux is made from a resin taken from pine tree sap. It's a little sticky and can sometimes leave behind some residue that you'll need to clean up, but it works well and it's affordable.
- Organic acid flux is made with glycol bases and it can give a strong cleaning to your soldered piece. However, because of its strength, it can leave behind some residue on your working space which you'll need to clean once you're done.
- Inorganic acid flux is an extremely strong option and one of the most powerful flux types. It doesn't leave behind residue on your cleaning space like rosin and organic fluxes do. This type is ideal to use on heavy metals like brass and copper.
Tweezers
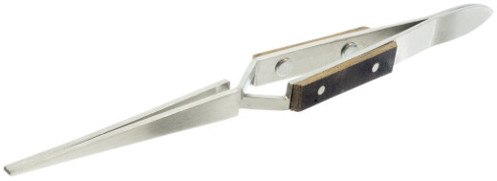
Tweezers and picks are important tools. They will help you move the jewelry around without causing indents to the metal or burns to your body. While soldering tweezers look like a typical pair of tweezers, they are made to be more durable and have wider handles to help protect your fingers. We recommend using crosslock tweezers.
Flush Cutter
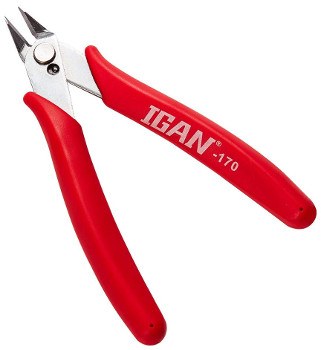
A flush cutter is essentially a wire cutter made for jewelry. If you use paste solder then you won't need it. This cutter will allow you to cut solder pieces without worrying about them flying everywhere due to the cutting force. A regular pair of pliers can also get the job done.
Pickling Solution
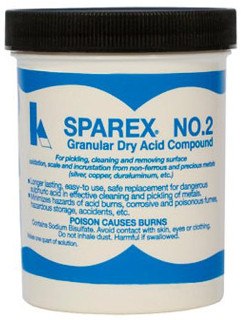
Pickling solution helps the oxidation process when you solder. It will work to stop the piece from rusting and getting warps and bubbles in it. This acidic solution can be made yourself with vinegar, salt, and hydrogen peroxide, or you can buy a pre-made pickling solution.
Copper Tongs

We recommend using copper tongs to take your silver piece out of the pickling solution.
Step by Step Instructions
Soldering jewelry can easily be done on your own. You'll just need to properly follow the steps to ensure that everything goes smoothly. Below are the steps for hard soldering silver jewelry.
Note: If you are using paste solder then you can skip steps four and five.
1. Clean Your Silver
For best results, you should clean your silver and your solder beforehand. The best option for a home cleaning solution is to use either baking soda and water or toothpaste.
2. Gather Your Materials
Get all your materials together and put them on your soldering board.
3. Make a "pickle"
First get a bowl and add water to it. Next add your pickling solution to the water.
4. Cut Up the Soldering Material
You'll now want to cut your solder material to get it ready. This is best done with a flush cutter which will give you a tight grip on the piece and prevent the material from flying somewhere after you cut it.
5. Prepare the Solder Piece and Add Flux
After cutting the solder material, you'll want to start preparing it. Add flux to the edges where you want to attach the solder to the silver.
6. Attach the Solder Piece to the Jewelry
Take a pair of tweezers, lift the solder piece up, and then place it where you want to attach it to the jewelry piece. Next take your torch and start to heat the area so that the solder melts on the piece. Be careful to not put the torch's flame directly on the solder as the solder will only end up melting in a different angle due to it following the heat source. To prevent this, direct the flame to where you want the solder to connect.
7. Drop Your Creation in the Pickle
Once the solder has been fused, drop your new creation in the pickle. After a few seconds have passed, remove the piece from the pickle with the copper tongs and place it on your soldering board so it can continue to cool down.
Conclusion
This process might seem difficult, but it doesn't have to be. You can easily solder your own jewelry to create your own masterpieces or even repair items you have. While it does require careful research before you try to do it yourself, the time invested will be well worth it.